Shooting Underwater in the Virgin Islands
Tropical Vacation
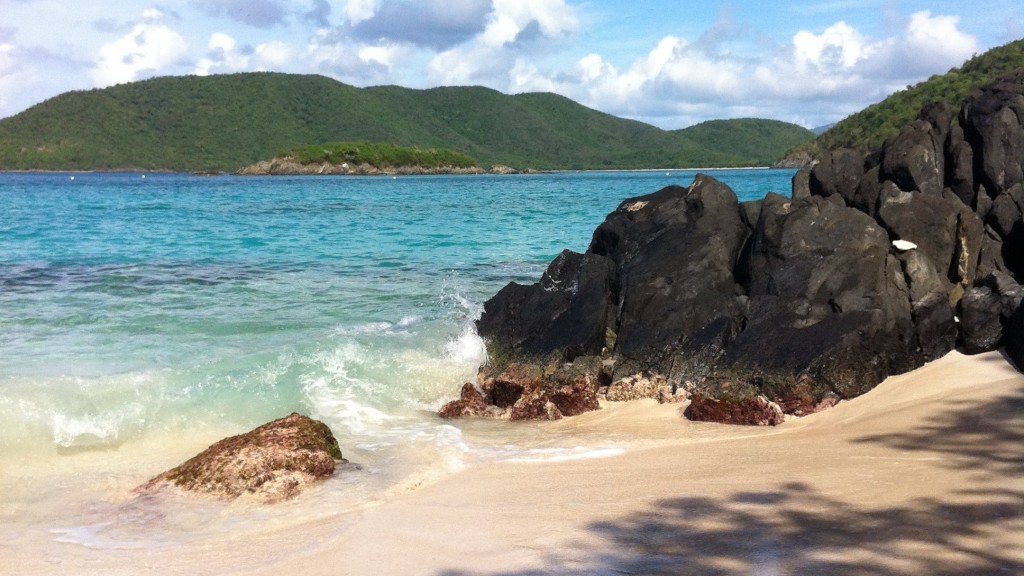
After a pleasant Thanksgiving in New England, Athena and I spent a week exploring and snorkeling in Virgin Islands National Park on St. John, USVI. Even though this was truly a vacation and NOT a work trip, I did bring along two GoPro point-of-view HD video cameras & accessories to document the fun. These are the small, rugged and low priced cameras that are used in many action sports mounted to helmets, bikes, skis, etc. Two weeks earlier, I had found a brand new Hero 3 Black Edition at a Best Buy in Gilroy, California. I’d gone to nearly ten Best Buys that week to finally find the Black Edition, which was not officially shipping yet! I could have shot the whole trip with just the Hero 3, but since it was a newer camera, I wasn’t sure about power draw or access to electricity that I’d have on the trip, so I also brought my Hero 2 as a back-up that I mainly used as a surface camera. Even though all GoPro cameras are water-proof, many folks don’t realize that the Hero 1 and 2 can’t really shoot underwater due to the curved plastic lens cover. GoPro just released a new underwater housing for these older cameras, and it’s included with all the new Hero 3’s.
For Camera Nerds
With two exceptions, all footage was shot at 1080p, some at 30 frames per second, but most underwater footage was over-cranked to 60 fps (which you also can’t do on a Hero 2.) Once it was slowed down, it really helped stabilize the handheld swimming shots and added a little slow motion grandeur to the action. There are two shots that are 720p 120 fps, which really helped stabilize my jerky underwater movements, but definitely made things a little too soft. The camera can also shoot 2.7K and even 4K footage, but at only 15fps, which seems strangely impractical. I didn’t use any of these settings on this trip, but I will play with them more in the future. In particular, I’m wondering if 2.7K 30p footage could be zoomed in and stabilized in post, and if this would be better than just over-cranking the 1080p. I think in the future, I will most likely run this camera at 1080p 60 fps for most work.
Since I was also concerned about running out of memory and power, plus buggy firmware (this was a VERY new camera), I did NOT shoot with the new ProTune setting. In retrospect, I regret this decision, mainly for the variations in white balance that happen underwater, at different depths and as clouds passed between the sun and water. With ProTune, I could have locked the white balance instead of having it always running on auto. This was my first time shooting video underwater, and since I didn’t bring a computer on the trip, I wasn’t able to look closely at the footage in the field, and I hadn’t considered how variable the light would be, especially as I dove down to 20 or more feet.
Camera Support
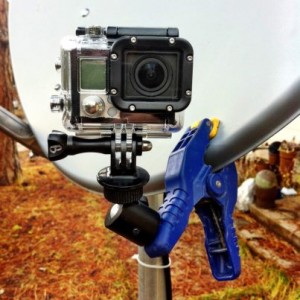
My favorite thing on this shoot was a camera mount made from a spring-loaded clip and a small ball-head. I clipped it to numerous vehicles and structures for both video and time-lapse, and it also made a decent handle for hand-held shots. For underwater shots, especially at depth where I couldn’t stay for long, I clipped the camera to a flat rock which I set down in front of some awesome scene and swam away. Eventually, the spooked fish would return, and I’d let the camera roll for a couple of minutes before going back down to retrieve the camera. I really think these shots do the best job of conveying the underwater world of Virgin Islands National Park.
After spending three summers shooting time-lapse of Yosemite’s night skies, I finally got around to putting them all together for a new episode of Yosemite Nature Notes. When I bought a Canon 5D Mark II back in 2009, it was the first camera that I’d ever owned that allowed me to shoot astro time-lapse, so I began capturing the wonders of the universe that can be seen from Yosemite National Park. Like many shooters, I often focused on the incredible “clouds” of the Milky Way near Sagittarius, often puting a rock or a tree in the foreground for interest. Eventually, I realized that these types of images were becoming pretty generic, so by 2011 I began to focus on the bigger landscape of the park, trying to create shots that really said “Yosemite.” Taking advantage of a 50% waxing moon about a week before full, the moonlight would set on Half Dome or other landforms, illuminating the landscape and yet still providing enough darkness to see the stars.
After my Moonbows episode came out in 2011, I used YouTube’s powerful analytics to learn that viewers found the time-lapse shots of photographers more interesting than the actual moonbows, so I then decided to include more people and telescopes at the Glacier Point Star Parties. Finally, in August of 2012, I got my last interviews, picked up a few more Star Party shots, and with the help of climbing-bum/editor Jeff Lodas, knocked out the edit in about a week.
So far, this episode has been a smash hit, with over 100,000 views in its opening week, more than any previous episode has experienced. It may take a while before it breaks 4 million like Frazil Ice, but I do feel that this is one of the strongest episodes yet.
Enjoy!
I was recently interviewed by Sohail Mamdani from Borrowlenses.com about my journey from photography to filmmaking and my current work in Yosemite and other parks. Give a listen and you’ll learn several secrets from my past, as well as my current thoughts on cameras, hardware and filmmaking in general.
http://www.borrowlenses.com/blog/2012/05/blcast-episode-2-an-interview-with-steve-bumgardner/
It was a crazy wet season in Yosemite and the Sierra Nevada this winter. Crazy as in crazy dry. Tioga Pass opened up two weeks ago, after being closed for only 4 months, perhaps the shortest seasonal closure in the history of the pass. My hopes of producing a new episode of Yosemite Nature Notes about skiing in Yosemite were dashed on the rocks that continued to poke through the thin snow. So after a 5 month literal and figurative drought, I finally came out with a new episode this past week, just in time for this years meager spring run-off.
Fortunately, I had plenty of big water footage on hand from previous seasons, especially last years amazing flows and floods in Yosemite Valley. This new episode is perhaps the most “interpretive” and thematic of all eighteen YNN’s, and I really wanted to focus on what happens to the water of Yosemite AFTER it flows out of the park. I hope that viewers will watch, learn and re-connect with Yosemite when they take a drink of water in the their homes or enjoy a strawberry or almond that was most likely grown with water from the Sierra Nevada.
One year ago, I was intensly focused on capturing orange light on the ephemeral Horsetail Fall in Yosemite Valley. Pouring off the side of El Capitan, this seasonal waterfall attracts thousands of photographers every year in February when it is transformed into a natural “firefall” right before sunset. Last year, we had a fair bit of weather during the two week window that the firefall effect takes place, so getting good shots was a little tricky. I was trying to get a new episode of Yosemite Nature Notes out about this phenomenon as well as the original man-made Firefall from Glacier Point. I never really got the “money” shot that I was hoping for, but the episode was saved thanks to fellow filmmaker Sterling Johnson, who let me license a few shots from his collection. I also interviewed Michael Adams, son of Ansel, Tony Rowell, son of Galen, and local photog Michael Frye, whose blog is a great source of information about photographing Yosemite.
We’ve had an extremely dry winter, so I haven’t been too optimistic about there being much water in the fall this year, but that may be changing. A new storm is rolling in, and the forecast calls for a couple of inches of snow for Yosemite Valley. Provided that it clears up after the storm, this should be enough snow to get the water flowing, so I’ll be out in Valley later this week, trying to get a few more shots for my library.
For the last days of 2011, my wife Athena and I headed from Yosemite Valley over the mountains to historic Benton Hot Springs to camp and soak. We went over Tioga Pass, down Lee Vining canyon and past Mono Lake, heading toward the north end of the White Mountains near the state line with Nevada. Tioga Pass, the highest paved road in the Sierra, is just under 10,000 feet, and on most years, the first snows of November will close the road for up to 7 months. Since Halloween however, I’ve made several of what I thought would be “one last” trips over Tioga Pass only to find that it never really snowed and it never really closed.
After a record breaking dry December, when no recorded precipitation fell in nearby Fresno, the pass is still open and Yosemite Valley has been enjoying sunny days in the high 50’s. Throughout the park, even up on 13,000 foot Mount Dana, there’s just not much snow in sight. Perhaps I chose the wrong year to make a Yosemite Nature Notes Special Feature about winter!
Thankfully, I’ve been shooting winters in Yosemite for a few years now on a variety of cameras, such as the Sony Z1, Canon A1, Sony V1U, & my current Sony EX1R. This new production was mainly an exercise in digging through tapes and hard-drives to find my best winter shots, and trying to match up this disparate footage with color correction and sharpening. Since I didn’t spend time shooting, I focused on the task at hand: creating a short, 3-minute art piece, basically a music video, that’s my Valentine to Yosemite winter lovers everywhere who are patiently waiting for the first flakes to fall.
A few weeks ago, in the middle of whole bunch of camera hype, I decided that I’d like to play around with a pinhole camera again. Instead of dicussing sensor sizes, frame rates and power consumption, I’d go back to the roots of photography: a light-tight box, a piece of film and a simple aperture. I’d built a few pinholes back in the day, cameras that were designed to use black & white print paper as the “film” stock, which of course generates a negative image.
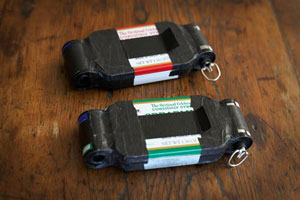
For over ten years now I’ve had several rolls of slide film sitting in my fridge and also the corresponding pre-paid processing mailers. I thought that a pinhole camera would be a neat way to finally use this film. At first, I assumed that I’d make my own camera, using a cookie tin or a cigar box. That was before PetaPixel turned me on to the MintyCam from Chris Keeney.
It was perfect! Small, easy, cheap. I ordered one and a roll of opaque black tape used to mount the film roll. Chris was also nice enough to send me some extra copper foil so I could play with different sized pinholes, and included a small tripod mount on the bottom of the tin. With this gear in hand and one of my trusty tripods, I headed up the Tioga Road in Yosemite.
I was using Fuji Sensia 100 slide film, which has very little exposure latitude, so I bracketed my exposures between one and three seconds in the full sunlight. The handy little magnet/shutter was easy to pop off, count, and pop back on again without shaking the camera. I blasted through a few rolls, and sent the film off to the lab later that week.
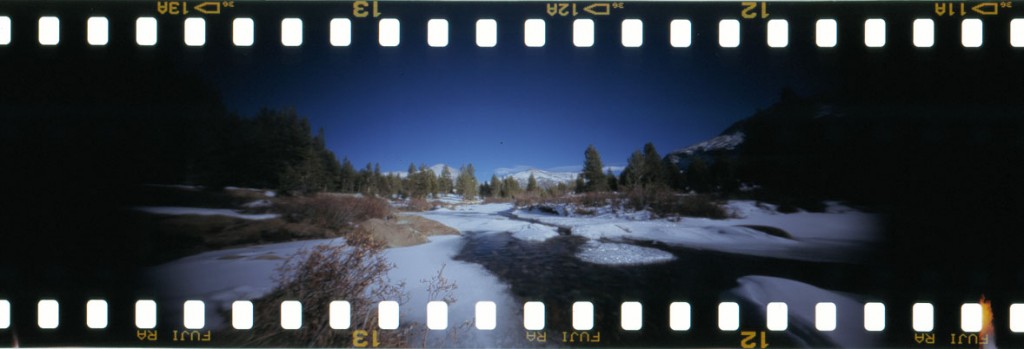
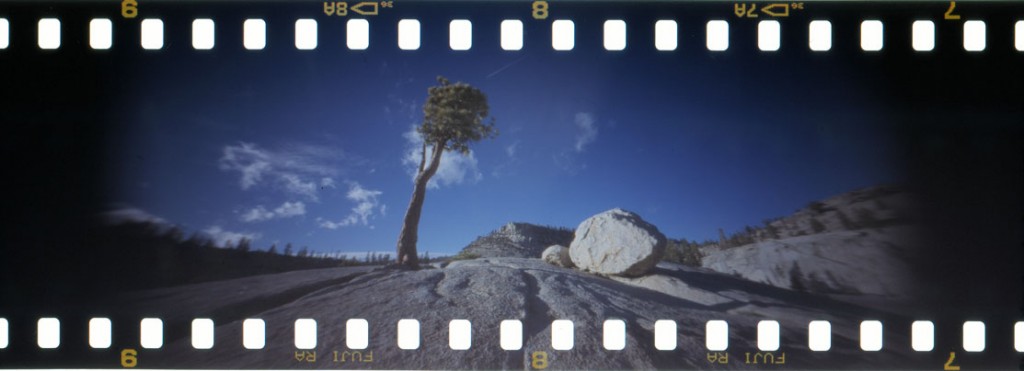
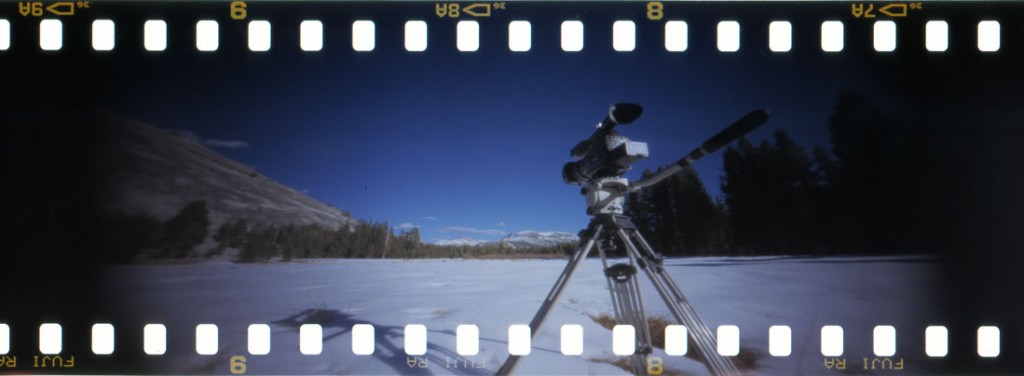
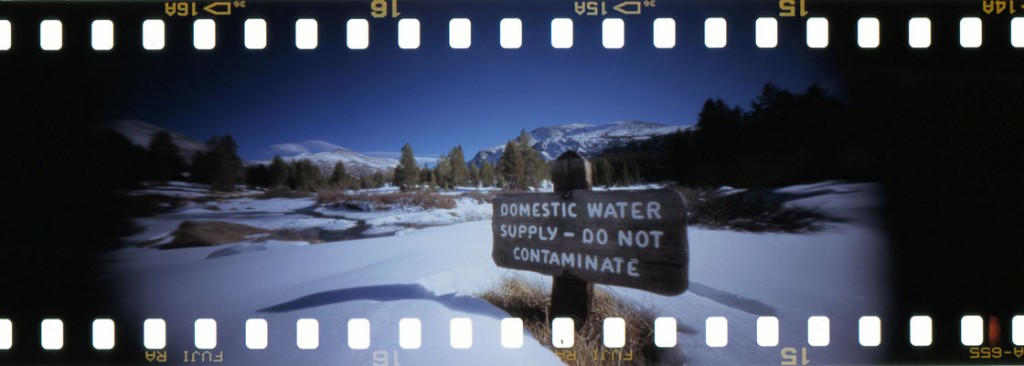
Ever since going digital about ten years ago and getting that immediate feedback, I’d forgotten how exciting it was to wait and see what I’d captured! I checked my mailbox anxiously for days until I finally got the film back. Just the smell of the emulsion took me back in time. I held the film up to the light, cut it into the individual images, and scanned them on my flatbed scanner. Here are some of the highlights:
It turns out that one second was generally the proper exposure for my sunny subjects. The shallow tin makes for a pretty wide angle image, probably around 14mm equivelant, so there’s some fun distortion. I’m suprised how sharp the image actually is, considering that it’s just a hole! Chris uses a tiny drill instead of a needle, so the .006″ diameter hole is very round, which increases sharpness. The only way to get a sharper image would be to have the hole laser cut.
I own dozens of film and digital cameras and I’m definitely a tech-y gear hound, but there’s a simple joy in taking a step back and using this very basic technology. I really like the shape of the image on the film strip and of course the sprocket holes are a cool retro artifact. I look forward to playing around more with the MintyCam and will probably try building a few other cameras this winter, but I’d better hurry. This sad note was included with the processed film: “We must inform you that due to industry shifts and demand, A&I will no longer process E6 film as of December 23, 2011.”
I’ve still got about ten of these pre-paid film processing mailers laying here so I better get shooting!
After a final editing push and a few technical hiccups, I’m pleased to announce that I just completed the newest episode of Yosemite Nature Notes. This one features my favorite tree in Yosemite Valley, the Black Oak, showing the tree in its various seasonal moods, and also telling the story of the mighty acorn and the importance that this seed plays in the lives of animals and people. I’m excited to have three people making their YNN debut in this one, in particular Julia Parker, basket weaver, acorn pounder and cultural demonstrator extraordinaire.
I’d like to thank Erik Westerlund and Bill Kuhn for appearing as well. This episode is my most collaborative production yet. I had editing help from my good friend Ryan Christensen, Brent Bain from Yosemite Valley composed a great new piece of music, and as always, Josh Helling helped me get some of the great shots of these awesome trees. I hope you like it!
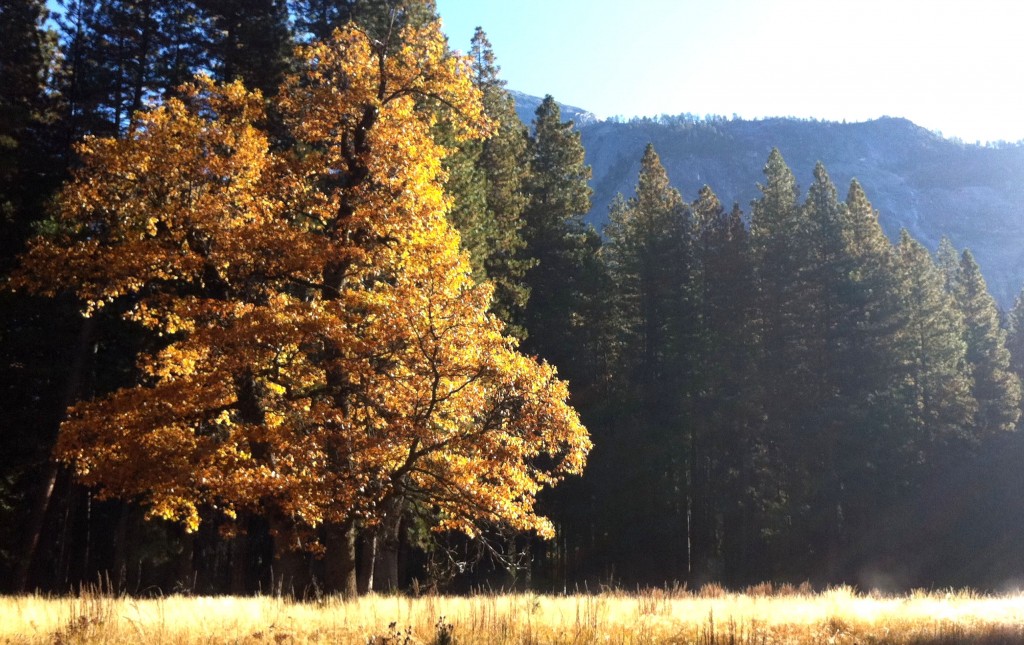
I just did a quick bike ride around the east end of Yosemite Valley to check out the fall colors, and I’m not too impressed this year. Big Leaf Maple and Dogwoods are doing fine, but my favorite tree, the California Black Oak looks pretty bad. Instead of a golden yellow, most of them are just wilting and turning brown.
There’s lots of variables that affect fall color, but mostly it’s photoperiod (the length of the day) and temperatures. Unfortunately, it got pretty cold here about 2 weeks ago, and we had sub-freezing temperatures in Yosemite Valley. These cold temps froze the leaves, bursting their cells, which led to the brown wilt. Not all the leaves froze and the tops of many of these oaks, which can be over 100 feet tall, still have some green leaves on them, but I’m not very optimistic about this years color on Black Oaks.
So why does it sometimes take over a year to shoot a 7 minute episode of Yosemite Nature Notes?
Right now, we’re working on the “Black Oaks” episode about these charismatic but often overlooked trees. In order to show viewers the seasonal dynamics, I wanted to make sure that I captured them in all moods and seasons. Stark trunks in the winter, red velvety leaves in spring, shady green summers and of course, brilliant fall color.
Of all of these different states, fall color is the most dramatic and unpredictable. That’s why Josh Helling and I spent over a week LAST fall shooting tons of Black Oaks in full fall regalia. In 2010, these trees put on a fantastic display, and it was one of the best falls that I’d experienced in Yosemite Valley. If we hadn’t shot all that great footage then, I would be freaked out right now, scrambling to find a few individual oaks hidden throughout the park that looked presentable.
Now repeat this same concept for peak waterfall flows, wildflower displays, snow storms, frazil ice, moonbows, night skies, bears, et cetera, and you’ll understand why it sometimes takes forever to get the shots I need to do justice to these ephemeral subjects.
Since this years display is less than spectacular, here’s a little taste of the great colors from last year. Enjoy!

